Contents
- 1 You Don’t Need to Be a Designer to Make Something Beautiful
- 2 What Makes a Photo Collage Tool Truly User-Friendly
- 3 Tips for Creating Great Photo Collages Without a Design Background
- 4 1. Start With a Layout Grid Rather Than a Blank Canvas
- 5 2. Use Adobe Express for a Seamless Beginner-Friendly Experience
- 6 3. Curate Your Photos Before You Start Designing
- 7 4. Limit Your Color Palette to Two or Three Tones
- 8 5. Pay Attention to Spacing and Padding Between Photos
- 9 6. Use Text Sparingly and Place It Strategically
- 10 7. Choose a Consistent Filter or Color Treatment Across All Photos
- 11 8. Design With Your Final Output Size in Mind
- 12 9. Use Backgrounds to Set the Mood of the Whole Collage
- 13 10. Save an Editable Version Before You Export
- 14 FAQ: Photo Collage Makers for Beginners
- 15 What is the easiest way to get started with a photo collage if I have never made one before?
- 16 How do I make a photo collage that looks good when printed?
- 17 How many photos should I include in a collage?
- 18 Can I use a photo collage maker for business or marketing purposes?
- 19 What is the difference between a photo collage and a photo grid?
- 20 Conclusion
You Don’t Need to Be a Designer to Make Something Beautiful
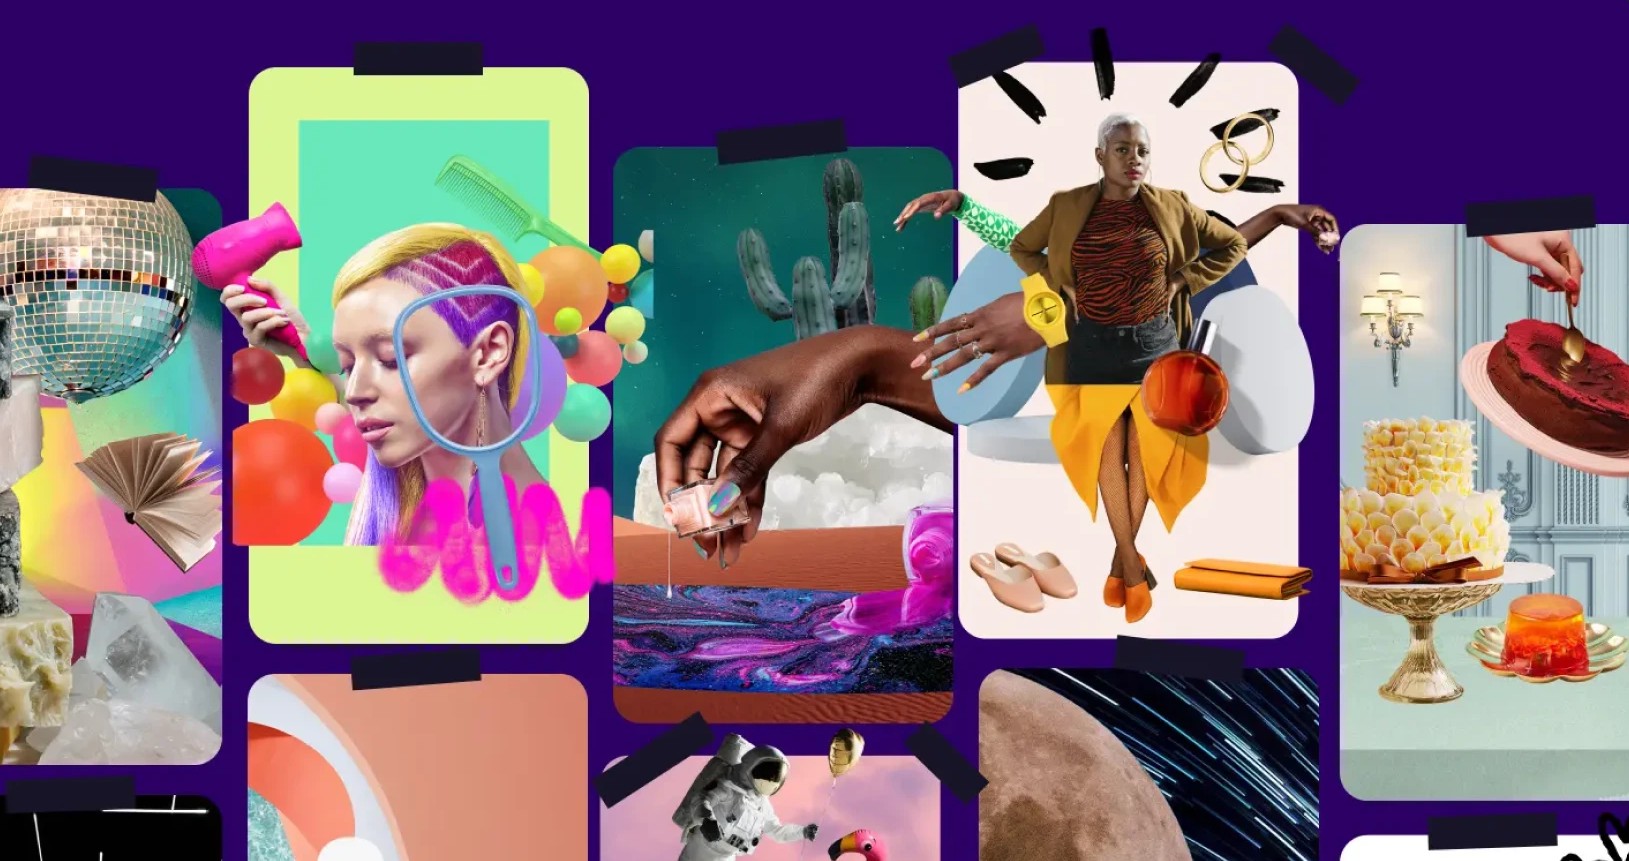
Photo collages are one of the most satisfying ways to tell a visual story, whether you are celebrating a milestone, promoting a product, or simply organizing memories from a trip. The problem is that most people assume creating a collage that actually looks good requires some level of design skill they do not have. The reality in 2026 is quite different: a new generation of online collage tools has made the process so intuitive and template-driven that anyone with a collection of photos and a clear idea of what they want to communicate can produce something genuinely impressive. The trick is knowing which tools to use and how to use them well.
What Makes a Photo Collage Tool Truly User-Friendly
The phrase “user-friendly” gets thrown around a lot in software marketing, but when it comes to photo collage makers, it has a specific meaning that is worth unpacking. A truly user-friendly collage tool does not just have a clean interface — it actively guides users toward good design decisions without requiring them to understand why those decisions are good. It removes the friction from every step of the process, from uploading photos to choosing a layout to exporting the final result.
The features that separate genuinely accessible collage tools from frustrating ones include: drag-and-drop photo placement, a library of pre-built layout grids that handle the structural work for you, automatic background and spacing options, easy text overlay tools, and one-click color and filter adjustments. Tools that require you to manually resize and position every photo in the frame are not truly beginner-friendly, regardless of how attractive their interface looks in screenshots.
Also worth considering is how the tool handles the inevitable moment when something does not look right. Platforms with strong undo functionality, simple alignment tools, and forgiving drag-and-drop behavior make the learning curve much gentler for users who are figuring things out as they go. The best tools feel less like software and more like a helpful assistant who handles the technical details while you focus on the creative decisions.
Tips for Creating Great Photo Collages Without a Design Background
1. Start With a Layout Grid Rather Than a Blank Canvas
One of the most common mistakes beginners make is opening a blank canvas and trying to figure out photo placement from scratch. This approach works well if you have design experience, but for everyone else, it typically leads to an unbalanced, cluttered result. Instead, always start by choosing a pre-built layout grid that matches the number of photos you want to include and the general shape of the final collage.
Layout grids handle the hard work of proportion and balance automatically. When all your photos snap into defined cells, the composition has a built-in structure that makes the overall design feel intentional and polished. You can still customize spacing, border thickness, and photo positioning within each cell, but the structural foundation is already solid before you make a single creative decision.
2. Use Adobe Express for a Seamless Beginner-Friendly Experience
For users who want professional results without any design experience, the collage maker from Adobe Express is one of the most capable and accessible options available in 2026. The platform offers a wide range of collage layouts organized by photo count and orientation, so you can immediately filter to the templates that fit your specific project. Photos are added via drag-and-drop, and each template is fully customizable without requiring any knowledge of design principles.
What sets Adobe Express apart for beginners is the combination of ease and quality. The templates are designed by professionals, which means that even minimal customization produces a result that looks polished. The platform also integrates Adobe Stock imagery, so if you want to supplement your personal photos with background textures, design elements, or additional visuals, those resources are available directly within the editor. For anyone creating collages for social media, marketing materials, or personal projects, Adobe Express offers the depth of features to grow with you as your skills and ambitions develop.
3. Curate Your Photos Before You Start Designing
The quality of a photo collage is determined largely by the quality and cohesion of the photos that go into it. Before you open any design tool, spend a few minutes selecting and editing the photos you plan to use. Look for images that share a consistent lighting tone — mixing bright outdoor shots with dark indoor photos in the same collage creates jarring contrast that no template can fully fix.
Aim for variety in composition within your selection: a mix of close-up shots, wider shots, and detail images creates more visual interest than a grid of identically framed photos. If your photos need basic adjustments like brightness correction or cropping, handle those in your phone’s native photo editor or a simple editing tool before uploading them to the collage maker. Starting with strong, cohesive source material makes every other step in the process easier.
4. Limit Your Color Palette to Two or Three Tones
Color is where many beginner collages go wrong. When backgrounds, text, borders, and filters are all different colors with no relationship to each other, the design feels chaotic regardless of how good the individual photos are. Applying a simple rule of two to three coordinating colors across all non-photo elements of your collage instantly makes the design feel more intentional and unified.
The easiest way to build a palette is to pull colors directly from one of your photos. Most online collage tools let you use the eyedropper or color picker to sample a hue from an image and apply it to a background or text element. Choosing your palette this way ensures that all the colors in your collage have a natural relationship to each other because they all come from the same visual world.
5. Pay Attention to Spacing and Padding Between Photos
The gap between photos in a collage is called the gutter, and its size has a significant effect on the overall feel of the design. Tight gutters or no gutters at all create a dense, immersive collage that feels energetic and full. Wider gutters give each photo more breathing room and create a cleaner, more editorial look. Neither approach is wrong, but the choice should be deliberate and consistent throughout the design.
Most collage tools let you adjust gutter size with a slider or a simple setting. Take a moment to experiment before settling on a final value. One common beginner mistake is accepting the default spacing without considering whether it fits the mood of the project. A wedding anniversary collage probably calls for generous spacing and a light background, while a sports highlights collage might feel more dynamic with tight borders and a dark background.
6. Use Text Sparingly and Place It Strategically
Adding text to a photo collage can give it context, personality, and purpose — but it can also overwhelm the photos if it is not used carefully. As a general rule, keep text in a collage to a minimum: a title, a date, a short caption, or a brief quote is usually enough. More than that starts to compete with the photos for visual attention, which undermines the whole point of the collage.
When placing text, look for areas of the collage where there is a natural visual pause — a lighter section of a photo, the space between two images, or a dedicated panel set apart from the photo grid. Overlaying text directly on a busy or dark area of a photo makes it hard to read. If you need text on a complex background, add a subtle color overlay or text box behind the lettering to ensure legibility.
7. Choose a Consistent Filter or Color Treatment Across All Photos
If your photos were taken at different times, in different lighting conditions, or with different cameras, they may not naturally look like they belong together. Applying a consistent filter or color treatment across all the photos in a collage is one of the quickest ways to create visual cohesion. Even a subtle adjustment — a slight warmth increase, a gentle desaturation, or a consistent contrast boost — can make a group of mismatched photos feel like a unified set.
Many collage platforms offer the ability to apply filters to all photos simultaneously rather than one at a time. This feature is worth seeking out because it makes the process fast and ensures that the treatment is truly consistent rather than subtly different from photo to photo. Avoid filters that are so heavy or stylized that they obscure the details of your photos — the goal is cohesion, not transformation.
8. Design With Your Final Output Size in Mind
A collage designed for Instagram is a fundamentally different project than one designed to be printed as a 16×20 poster, and treating them the same way leads to problems. Designs optimized for small screen viewing can look thin and underwhelming when printed large. Designs built for print often have too much detail to read clearly at thumbnail size on a phone screen.
Before you start, decide where your collage will ultimately be seen and at what size. Choose your canvas dimensions accordingly, and think about how elements like text size, photo count, and border thickness will translate to the final output. Most online collage tools offer preset canvas sizes for common use cases like social media posts, print sizes, and presentation formats. Using the right preset from the beginning saves you from having to resize and reformat everything at the end.
9. Use Backgrounds to Set the Mood of the Whole Collage
The background of a collage is the visual foundation that everything else sits on top of, and it deserves more thought than most beginners give it. A plain white background is clean and neutral but can feel flat. A solid dark color adds drama and makes photos pop. A subtle texture — linen, paper, wood grain — adds warmth and depth without competing with the photos.
Most collage platforms offer a selection of background colors, gradients, and textures. Some also allow you to use one of your own photos as a blurred or tinted background, which can create a beautifully cohesive result when the background photo shares colors with the rest of the collage. Experiment with a few background options before committing, because the same set of photos can feel completely different depending on what they are placed against.
10. Save an Editable Version Before You Export
This tip is practical rather than creative, but it saves a significant amount of frustration. Before you export your finished collage as a JPEG or PNG, make sure you have saved an editable version in the platform’s native format. If you later need to update a date, swap out a photo, correct a typo, or resize for a different platform, having an editable saved file means you can make those changes in minutes rather than rebuilding the entire collage from scratch.
Most cloud-based design platforms save your work automatically and keep a version history, but it is worth double-checking before closing a project. Name your saved file clearly with the project name and date so you can find it quickly later. For recurring projects — an annual family photo collage, a monthly team highlight reel — a well-saved template becomes an incredibly useful starting point the next time around.
FAQ: Photo Collage Makers for Beginners
What is the easiest way to get started with a photo collage if I have never made one before?
The most accessible entry point for a first-time collage maker is to choose a platform that leads with templates rather than a blank canvas. Start by selecting a layout that matches the number of photos you want to include, then upload your images and let the template handle the structural composition. From there, your only decisions are about color, text, and minor adjustments to photo positioning within each cell. This approach removes the two most intimidating aspects of design for beginners — composition and proportion — and lets you focus on the creative and personal elements of the project. Most modern collage platforms are entirely browser-based and require no download or account setup to try, which means the barrier to starting is lower than ever.
How do I make a photo collage that looks good when printed?
Printing a photo collage successfully comes down to resolution and canvas size. When setting up your collage, choose a canvas size in inches or centimeters rather than pixels, and set the resolution to at least 300 DPI (dots per inch). This ensures that the final file contains enough image data to print sharply at the intended size. Photos taken on modern smartphones are typically high enough resolution for prints up to around 8×10 inches, but may start to look soft at larger sizes. For large-format prints, use the highest resolution photos available and avoid cropping them too aggressively within the collage layout. Export your finished collage as a PDF or high-resolution PNG for the best print results, and consider using a professional printing service like Mpix for high-quality output on premium photo paper.
How many photos should I include in a collage?
There is no single right answer, but a useful guiding principle is that fewer photos done well almost always looks better than many photos done hurriedly. Three to six photos is a comfortable range for a collage that reads as polished and intentional. Layouts with more photos — eight, ten, or twelve — can work beautifully, but they require more careful curation of the photos themselves and a cleaner, more minimal approach to text, color, and background to avoid looking overcrowded. When in doubt, err on the side of fewer photos and give each one more space. The photos you choose should feel curated, not exhaustive — a collage is not a contact sheet.
Can I use a photo collage maker for business or marketing purposes?
Absolutely, and many small businesses and marketers rely on online collage tools as part of their content creation workflow. Product showcase collages, before-and-after comparison layouts, team photo grids, and event highlight collections are all common business uses. The key consideration for business use is making sure any photos you include are either your own original images or sourced from a commercially licensed stock library. Collages created entirely from your own photos carry no licensing concerns. For stock images, verify that the platform’s license covers commercial use before publishing or distributing the collage in a marketing context. Many platforms that integrate a built-in stock library, like Adobe Express, include commercial licensing as part of the subscription, which simplifies this consideration significantly.
What is the difference between a photo collage and a photo grid?
These terms are often used interchangeably, but they describe slightly different things. A photo grid is a specific type of collage where all photos are arranged in a regular, uniform structure — equal-sized cells in a row-and-column format. It is clean, organized, and symmetrical. A photo collage is a broader term that includes grid layouts but also encompasses more dynamic arrangements: photos of different sizes, irregular shapes, overlapping images, and creative backgrounds. Collages tend to feel more expressive and energetic, while grids feel more structured and editorial. Most online collage tools support both approaches through their template libraries, so the right choice depends on the mood and purpose of your project. For professional or marketing contexts, grids often read as more polished. For personal storytelling or celebratory projects, a more dynamic collage layout may feel more fitting.
Conclusion
Photo collages have never been more accessible to create, and the tools available in 2026 make it entirely possible for someone with no design background to produce something genuinely beautiful. The key is approaching the process with a little intentionality: choosing the right layout, curating your photos thoughtfully, applying a consistent color treatment, and using text and backgrounds as supporting elements rather than distractions. With the right platform handling the technical structure, your creative instincts are more than enough to guide the rest.
Whether you are creating a collage for a personal milestone, a social media post, or a business marketing campaign, the tips in this article give you a clear and practical path to a result you will be proud of. Start with a strong template, keep your design choices simple and consistent, and remember that the photos themselves are always the star of the show. Everything else is just the frame.